
How to Wrap a Christmas Present of Any Kind: A Step-by-Step Guide
· Blog

Wrapping Christmas presents can be frustrating when the paper is too small, the corners look untidy, or the tape shows along the seams. Awkwardly shaped gifts and paper that tears around sharp edges can make the job even harder, wasting supplies and leaving presents looking messy.
This step-by-step guide shows you how to wrap Christmas presents of any shape, from rectangular boxes and bottles to clothing and awkwardly shaped gifts. Learn how to choose the right supplies, measure and fold wrapping paper neatly, fix common wrapping mistakes, and finish each present with ribbon, gift tags, or festive decorations.
What You Need to Wrap a Christmas Present
To wrap a Christmas present neatly, you need essential tools such as scissors, tape, a ruler, and a pencil, along with suitable wrapping paper and finishing materials like ribbon, gift tags, and tissue paper. Choose wrapping paper based on the gift’s size, shape, weight, and desired appearance to ensure a neat, secure finish.
Tools for Wrapping: Scissors, Tape, Ruler, and Pencil
The essential tools for wrapping Christmas presents are listed in the table below, along with their uses.
| Tool | Purpose | Practical tip |
|---|---|---|
| Scissors | Cut the wrapping paper to size. | Use sharp blades for cleaner edges and easier cutting. |
| Transparent adhesive tape | Secure the paper seam and folded ends. | Use short strips to hold the paper without applying excess tape. |
| Double-sided tape | Secure overlapping edges without exposing the adhesive. | Position the tape underneath the paper edge before pressing the layers together. |
| Ruler | Measure the paper and guide straight cuts. | Mark the cutting line before trimming the paper. |
| Pencil | Mark measurements and cutting lines. | Make light marks on the reverse of the paper where possible. |
Materials for Wrapping and Finishing: Paper, Ribbon and Tags
Wrapping paper covers the gift, while ribbon, tags, and tissue paper add the finishing touches. Choose materials that suit the gift’s size, shape, and wrapping style.
- Wrapping paper: Choose a sheet large enough to cover the gift, overlap at the seam, and fold over both ends. Medium-weight paper suits most rectangular gifts because it balances flexibility and tear resistance.
- Ribbon: A width of around 10-25 mm is a useful starting point for standard gifts. Satin ribbon has a smooth, glossy finish, organza is lightweight and translucent, and twine gives a simple, rustic look.
- Gift tag: Write the recipient's name beside “To” and the sender's name beside “From” before attaching the tag.
- Tissue paper: Use tissue paper to cushion delicate items or cover products inside a gift box or bag.
- Gift bag: Use a suitable-sized gift bag as an alternative for irregularly shaped items that are difficult to wrap neatly.
- Gift box: Place soft items, such as clothing, in a gift box before wrapping to create a firm base and help prevent the paper from sagging.
How to Choose the Right Wrapping Paper
To choose the right wrapping paper, follow the guidelines given below.
- Weight: Choose medium-weight paper for most gifts, lightweight paper for small items, and heavier paper for a sturdier finish.
- Finish: Use matt kraft paper for a natural look, glossy paper for shine, or foil and glitter paper for a festive appearance.
- Pattern: Select a pattern that complements your ribbon and gift tag, aligning repeating designs at visible seams where possible.
- Size: Choose paper large enough to cover the gift, overlap at the seam, and fold securely over both ends.
- Recyclability: Prefer plain, uncoated paper for easier recycling, and check local guidelines before recycling coated, foil, or glitter paper.
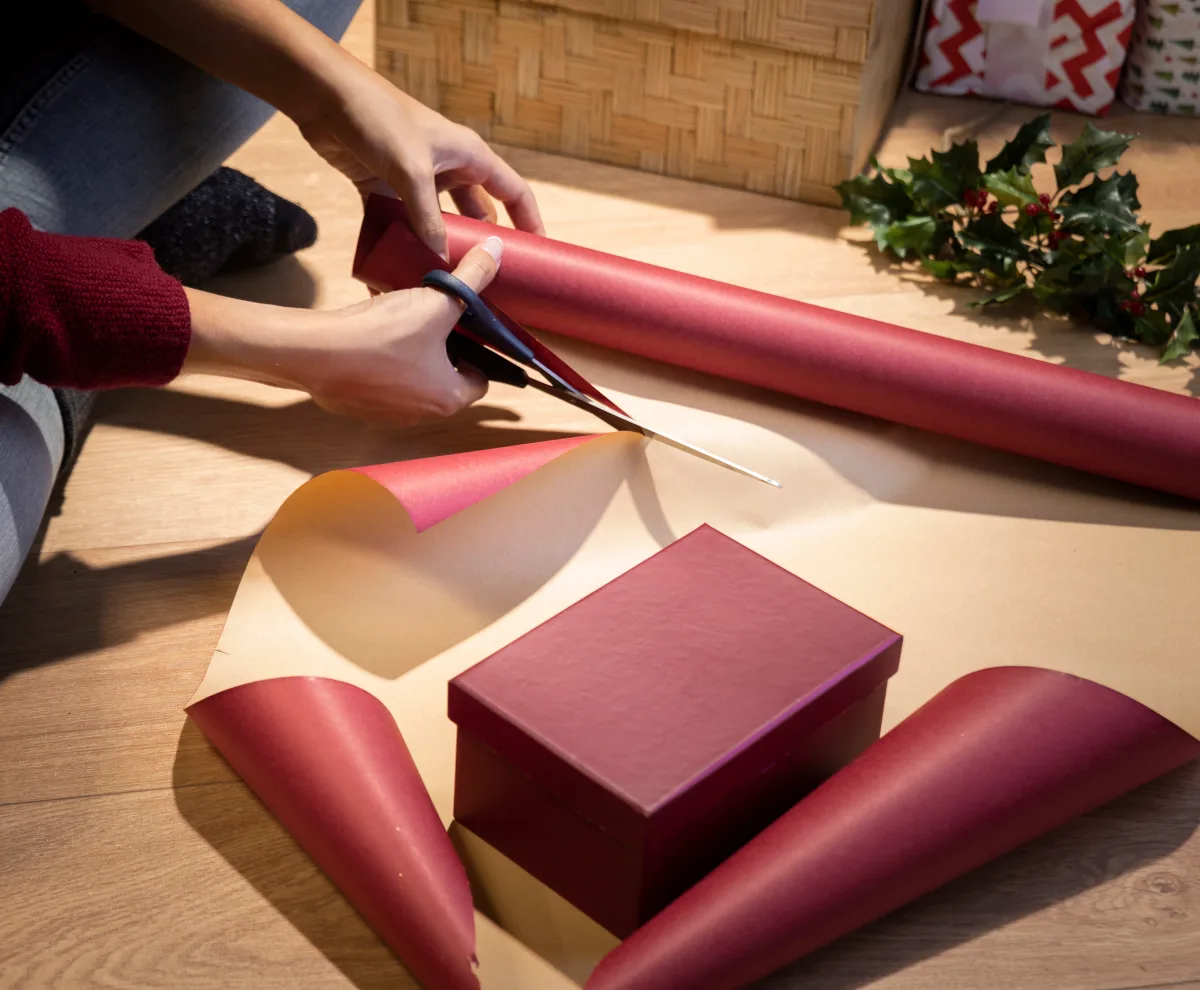
How to Wrap a Christmas Gift Box in Wrapping Paper (Step by Step)
To wrap a Christmas gift box neatly, prepare the box, measure and cut the wrapping paper, secure the main seam, and fold both ends into neat triangles. Finish with a ribbon and gift tag for a polished, festive presentation.
You can follow these step-by-step instructions to wrap a rectangular gift box securely with minimal paper waste.
Step 1: Prepare the Gift and Wrapping Surface
Prepare your Christmas gift box and wrapping area to make measuring, folding, and securing the wrapping paper easier. Remove price tags and unwanted stickers, check that the gift is complete, and position the box upside-down to keep the main paper seam hidden underneath.
- Clear a flat surface large enough to hold the Christmas gift box and wrapping paper.
- Remove price tags, stickers, and labels that should not appear on the finished gift.
- Check that the gift is complete, including any required batteries or protective packaging.
- Place the box upside-down on the unprinted side of the wrapping paper, leaving enough paper on every side to cover the box and fold both ends neatly.
- If your Christmas present is soft or irregularly shaped, place it in a gift box first to create a firm base for wrapping.
Step 2: Measure and Cut the Wrapping Paper
Measure the box before cutting the wrapping paper. The sheet must cover the box, overlap along the main seam, and provide enough material to fold over both ends.
For a rectangular Christmas box, use these formulas to estimate the paper dimensions:
- Paper dimension around the box: 2 × (box width + box height) + 2–3 cm for the seam overlap.
- Paper dimension along the box: box length + (2 × box height).
Follow these steps to measure, cut, and check the wrapping paper for a neat, secure fit.
- Measure the box's length, width, and height.
- Calculate the two paper dimensions using the formulas above.
- Mark the cutting lines with a ruler and pencil, or follow the grid lines printed on the reverse of the wrapping paper.
- Cut along the marked lines with sharp scissors.
- Position the box on the paper and check the coverage before making any final adjustments.
- If the paper seems too small, reposition the box diagonally and check the coverage again. Use a larger sheet if the paper cannot cover the box securely, overlap at the seam, and form both end flaps.
Step 3: Wrap the Main Body and Secure the Seam
Wrap the paper around the gift box, overlap the edges underneath, and secure the seam with double-sided tape for a smooth, neat finish.
- Pull one long edge of the wrapping paper across the underside of the Christmas gift box and hold it in place.
- Bring the opposite edge over the first, leaving an overlap of approximately 2–3 cm.
- Fold the raw edge under by about 1 cm to create a neat, straight finish.
- Place double-sided tape beneath the folded edge along the overlap.
- Press the seam firmly and smooth out any wrinkles to ensure the paper lies flat against the box.
Step 4: Fold the Ends into Neat Triangles
Fold the ends of your Christmas gift box neatly to create clean corners and a secure finish. Properly creased triangular flaps help the wrapping paper lie flat and keep the box fully covered.
- Press the wrapping paper against one short end of the Christmas gift box to create a crease along the top edge.
- Push the left and right sections inward to form two triangular folds.
- Fold the upper flap down against the end of the box.
- Fold the lower flap upward over the upper flap.
- Check that the flaps overlap enough to cover the end completely, then secure them with tape.
- Repeat the same process at the opposite end of the box.
Step 5: Finish with a Ribbon and a Gift Tag
Decorate your Christmas gift box with ribbon and a gift tag to add a festive finishing touch and personalise your present. Measure enough ribbon to wrap around the box, leaving extra length for a knot or bow.
- Wrap the ribbon around the Christmas gift box to estimate the required length, allowing extra ribbon for tying a knot or bow.
- Position the ribbon so the crossing sits near the centre of the box's top.
- Tie a secure knot or bow and adjust the loops so the ribbon lies flat.
- Write the recipient's name beside “To” and the sender's name beside “From” on the gift tag.
- Attach the tag beneath the ribbon or tie it securely with a short piece of twine.
How to Wrap Gifts That Are Not Rectangular Boxes
Wrapping non-rectangular gifts requires techniques depending on their shape and size, such as pleating paper around cylinders, gathering folds around bottles and balls, or using gift bags, fabric, and boxes for irregular items. The table below compares suitable wrapping methods for different gift shapes and sizes, along with their estimated preparation times and difficulty levels, to help you choose the most practical approach.
| Gift shape or Type | Wrapping method | Estimated time | Difficulty |
|---|---|---|---|
| Cylinder, such as a round tin | Roll paper around the cylinder, secure the seam, and pleat both ends. | 5–10 minutes | Easy |
| Bottle, especially a tall glass bottle | Wrap in paper or tissue and gather at the neck, or use a bottle bag or box. | 3–7 minutes | Easy |
| Round gift or ball | Centre the gift on a large sheet, gather the paper at the top and tie it with ribbon. | 3–7 minutes | Easy |
| Clothing and soft gifts | Fold the item flat, place it in a box or gift bag, then wrap or add tissue paper. | 5–10 minutes | Easy |
| Large or oversized gift | Join sheets of wrapping paper, wrap the gift in sections, or use a large gift bag or fabric. | 10–20 minutes | Moderate |
| Irregular or awkward gift | Use a box or bag, wrap in tissue and fabric, or secure separate paper sections with ribbon. | 5–15 minutes | Moderate |
How to Wrap a Cylinder
Wrap a cylindrical gift by covering its curved surface with paper, securing the seam, and folding the paper neatly over both circular ends. Small, even pleats help the paper lie flat and reduce bulky folds.
- Measure around the cylinder's widest point and add 2–3 cm for the seam overlap.
- Measure the cylinder's length and allow enough extra paper to cover both circular ends.
- Cut the paper and position the cylinder near one edge.
- Roll the paper around the cylinder until the edges overlap, keeping the paper snug without stretching it.
- Secure the seam with tape.
- Fold small sections of paper inward at one end to create even pleats, then secure the folds with tape.
- Repeat the process at the other end, ensuring that both circular ends are fully covered.
- Add ribbon or other decorations if desired, checking that the wrapping remains secure.
- If the ends are difficult to wrap neatly, place the cylinder in a suitably sized box or use a decorative gift bag.
How to Wrap a Bottle
A bottle can be wrapped using the cylinder method, but its narrow neck and potentially fragile glass require extra care. Wrapping paper creates a decorative finish, while a fitted box or protective packaging may be needed to reduce the risk of breakage.
- Measure around the bottle's widest point and add 2–3 cm for the seam overlap.
- Measure the bottle's height and allow enough paper to cover the base and gather around the neck.
- Wrap the paper around the bottle and secure the seam at the back.
- Gather the paper loosely around the neck and tie it with ribbon.
- Fold and secure the paper around the base, checking that the bottom is fully covered.
- Adjust the folds so the bottle stands securely without excessive pressure on the glass.
How to Wrap a Round Gift or Ball
A round gift has no flat sides or corners, so gathering the wrapping paper evenly is the key to a neat finish. Use a large sheet and create small folds around the gift to reduce bunching.
- Place the ball in the centre of a large sheet of wrapping paper.
- Check that the paper extends far enough beyond the ball to gather securely at the top. A sheet approximately 2.5 times the ball's diameter may be a useful starting point, but coverage depends on the paper's shape and the gift's dimensions.
- Lift the paper evenly around the ball, bringing the edges together above it.
- Fold the excess paper into small, even pleats.
- Gather the paper at the top and tie it with ribbon.
- Adjust the folds and check that the paper remains secure.

How to Wrap Clothing and Soft Gifts
Clothing and other soft gifts are easier to present neatly when folded flat and placed in a box or gift bag. A box provides a firm base for wrapping paper, while a bag offers a quicker alternative.
- Fold the clothing or soft item into a compact, flat shape.
- Place tissue paper underneath or around the item to protect the presentation and conceal the contents.
- Put the gift in a suitably sized box or bag, leaving enough room to arrange the tissue without crushing the item.
- If using a box, wrap it using the rectangular-box method described earlier.
- If using a gift bag, arrange the tissue paper around the gift so that it covers the contents neatly.
How to Wrap Large and Oversized Gifts
Oversized gifts need enough wrapping material to cover their full dimensions. When one sheet is too small, join multiple sheets or wrap the gift in sections, placing joins on the back or underside where possible.
- Measure the gift and estimate how much paper is needed to cover all exposed surfaces.
- If necessary, join sheets of wrapping paper by overlapping their edges by approximately 2-3 cm and securing the join on the reverse side.
- Position the joined paper around the gift and wrap it in manageable sections.
- Smooth the paper as you work and secure each seam with tape.
- Check that the entire gift is covered and that the joins remain secure.
- Add a bow or gift tag if desired.
How to Wrap Irregular and Awkwardly Shaped Gifts
Irregularly shaped gifts are difficult to wrap because uneven surfaces create gaps, wrinkles and loose folds. A box or gift bag provides a regular shape, while tissue paper and fabric can cover items that do not fit standard containers.
- Check whether the gift fits safely inside a suitably sized box or bag.
- If using a box, cushion the item with tissue paper or appropriate protective material, then wrap the box using the rectangular-box method.
- If using a gift bag, position the item securely and arrange tissue paper around it to conceal the contents.
- If the item cannot be boxed or bagged, cover separate sections with wrapping paper or tissue and secure the joins with ribbon or twine where practical.
- Check that the wrapping stays in place without putting pressure on fragile or protruding parts.
How to Wrap a Gift Without Wrapping Paper
You can wrap a Christmas present without conventional wrapping paper by using fabric, tissue paper, or a gift bag. Fabric is a reusable option for suitable gifts, while tissue paper and gift bags provide quick alternatives for soft or awkwardly shaped items.
Choose your method according to the gift's size, weight, fragility, and the materials available. Use fabric when you want a reusable covering, tissue paper for lightweight decorative wrapping, and a gift bag when the shape makes conventional wrapping difficult.
| Method | Materials | Best for | Reusable? |
|---|---|---|---|
| Fabric wrapping | Square cloth, tea towel, scarf, or bandana | Gifts that can be covered and tied securely | Yes, when the fabric remains in good condition |
| Tissue paper | Two or three sheets of tissue paper and optional ribbon | Lightweight gifts and decorative presentation | Sometimes, if clean and intact |
| Gift bag | Suitable paper or fabric bag and optional tissue paper | Awkward shapes and quick presentation | Yes, when clean and undamaged |
Fabric Wrapping (Furoshiki)
Furoshiki is a Japanese cloth-wrapping technique that uses a square piece of fabric to cover and secure a gift without wrapping paper or adhesive tape. A cloth measuring approximately 50-70 cm square is a useful starting point for a small box, provided its corners reach far enough to tie securely above the gift.
- Lay the cloth flat with one corner pointing towards you.
- Place the gift diagonally in the centre.
- Bring the nearest corner over the gift and tuck the fabric around the sides.
- Bring the opposite corner over the gift to cover the remaining surface.
- Bring the two remaining corners together and tie them in a secure knot.
- Adjust the folds and check that the knot holds the fabric in place.
Tissue Paper and Gift Bags
Use tissue paper to cover soft or awkwardly shaped gifts, and choose a gift bag when you want a quick presentation without folding wrapping material around the item. Tissue paper conceals the contents, while the bag holds the gift and makes it easier to carry.
- Place two or three sheets of tissue paper on a flat surface, layering them to provide enough coverage.
- Position the gift in the centre of the tissue paper. Fold the tissue gently around the item if it needs additional coverage.
- Lift the gift and tissue paper together, then place them inside a suitably sized gift bag.
- Arrange the tissue around the gift, leaving some paper visible above the bag’s opening to conceal the contents.
- Attach a gift tag to a handle using its string or tie it on with ribbon.
How to Wrap a Gift Without Tape
You can wrap a gift without tape by locking the paper folds together, securing the wrapping with ribbon or twine, or using fabric. Fold-and-tuck wrapping works best for lightweight gifts and thicker paper that holds its creases. Tape-free wrapping also avoids adhesive on the paper, which may make recycling easier where local facilities accept the material.
Fold-Lock and Tuck-In Methods
The fold-lock method secures wrapping paper by tucking one flap beneath another instead of using adhesive tape. It works best with a rectangular gift box and thicker paper that holds a firm crease.
- Cut a sheet of wrapping paper large enough to cover the box, with extra paper for the overlapping seam and end folds.
- Place the box upside down in the centre of the paper, ensuring the paper extends far enough beyond every side.
- Bring one long edge across the base of the box, then fold the opposite edge over it to create a clean seam.
- At each short end, fold the paper inward along the box’s edges to form neat triangular or angled flaps.
- Fold the lower end flap upwards, then fold the side flaps inward one at a time.
- Fold the final flap down and tuck its tip beneath the previous fold to lock the paper in place.
- Turn the box over carefully and check that the seam and end folds remain secure.
Ribbon, Twine and Belly-Band Closures
Ribbon and twine hold wrapping paper in place by crossing the main seam and applying gentle tension around the gift. A paper belly band works similarly but uses a strip of paper instead of cord or ribbon.
- Wrap the gift in paper and bring the overlapping edges together along the underside or back of the box.
- Hold the seam against the box while placing the ribbon, twine or paper band around the package.
- Position the band across the seam so it helps prevent the paper from opening.
- Tie ribbon or twine in a secure knot or bow. For a paper belly band, tuck or interlock the ends so the strip stays closed without tape.
- Adjust the closure until it holds the wrapping firmly without tearing the paper or pressing too tightly against the gift.

Creative Christmas Gift-Wrapping Ideas
Creative Christmas gift-wrapping ideas include rustic kraft paper with natural greenery, minimalist single-colour designs, elegant satin ribbon bows, and traditional red-and-green wrapping. You can personalise each style with simple decorations and gift tags to create a festive, thoughtful finish.
- Rustic Kraft Paper: Wrap gifts in brown kraft paper and decorate with jute twine, spruce sprigs, dried orange slices, or cinnamon sticks for a natural, festive look.
- Minimalist Single-Colour: Use plain cream, white, forest-green, or muted-red paper with a narrow matching or contrasting ribbon for a clean, modern style.
- Luxury Ribbon Bow: Choose matt wrapping paper in burgundy, navy, forest green, or black, then add a wide satin ribbon and a layered bow for an elegant finish.
- Traditional Red and Green: Use classic Christmas wrapping paper with contrasting ribbon, small bells, artificial berries, or festive gift tags.
- Personalised Gift Tags: Add handwritten tags with the recipient's name, sender's name, or a short Christmas message. Use kraft-paper tags, decorative cards, ribbons, twine, or small stickers to complement the wrapping style.
Common Gift-Wrapping Mistakes and How to Fix Them
Common gift-wrapping mistakes include cutting the wrong amount of paper, leaving visible tape, creating uneven corners, and tying loose ribbon. Use this table to identify the problem, make a quick repair, and avoid the same issue next time.
| Problem | Likely cause | Quick fix | Prevention |
|---|---|---|---|
| Too much paper | The sheet was cut larger than needed. | Refold the ends and trim small amounts of excess paper before securing them | Check the coverage and end folds before cutting. |
| Too little paper | The measurements or paper positioning were incorrect. | Reposition the box, add a paper strip, or use a suitable belly band or bag | Measure carefully and check the overlap before cutting |
| Visible tape | The adhesive is exposed along a seam. | Replace exposed tape with double-sided tape where possible, or cover the join with ribbon. | Fold the raw edge under and position the main seam underneath. |
| Bulky seams | Too many paper layers overlap. | Reduce unnecessary layers and flatten the seam. | Measure correctly and fold the paper edges neatly. |
| Wrinkled corners | The paper is loose, or the creases are misaligned. | Realign the paper and make fresh creases. | Keep the paper gently taut and fold along the box edges. |
| Torn paper | Thin paper or excessive tension caused damage. | Place a matching patch underneath the tear or cover a small damaged area with a tag or ribbon. | Use suitable paper and avoid pulling it too tightly |
| Loose ribbon | The knot or bow was not secured properly. | Retie the ribbon and adjust the loops evenly. | Test the ribbon length and secure the knot before trimming. |
Frequently Asked Questions
How Much Wrapping Paper Do I Need?
To determine how much wrapping paper you need, measure the length, width, and height of your box before cutting. Allow enough paper to cover the box, fold neatly over both ends, and overlap the main seam by 2–3 cm.
For a rectangular box, use these approximate formulas to calculate box dimensions.
- Paper width: 2 × (box width + box height) + 2–3 cm for seam overlap.
- Paper length: box length + 2 × box height.
How do I make the edges and corners look sharp and professional?
To make wrapping paper edges and corners look sharp and professional, pull the paper snugly around the box without overstretching it. Use your thumb and forefinger to press a crisp crease along every edge before securing the paper with tape. Fold the end flaps neatly into triangles, align the edges carefully, and use double-sided tape for a clean, seamless finish.
What Is the Easiest and Quickest Way to Wrap Christmas Presents?
A gift bag with tissue paper is usually the quickest option, while pre-cut wrapping paper and double-sided tape help create a neat finish on a box. Save time by measuring and cutting paper for all your boxes before you start wrapping.
Is Wrapping Paper Recyclable?
Yes, plain, uncoated wrapping paper is generally recyclable, but local council rules vary. Foil, glitter and plastic-coated wrapping paper are usually unsuitable for paper recycling.
Use the scrunch test as a guide: scrunch the paper into a ball and release it. If it stays crumpled, it is more likely to be recyclable paper; if it springs open, it may contain non-paper materials. Remove ribbons, bows, and as much sticky tape as possible, then check your local council’s recycling guidance.